
Last updated November 18, 2026





Free written scope consultation - allowances, timeline, and change-order rules on paper before a single trade is scheduled
Kitchen Remodeling Warning Signs Every Homeowner Should Know
If your contractor skips the range hood duct test before drywall closes, you won’t know the duct is undersized until your kitchen still smells like last Tuesday’s fish three years from now, and by then reopening the ceiling is a separate project with its own separate bill. The warning signs that cost the most in a remodel are rarely the ones you can see at the end. They’re buried behind drywall, under cabinet boxes, and inside a contract clause nobody reads twice. This guide walks through the signals that show up before close-out, while the fix is still cheap. We’ve seen these patterns across plenty of Oakland kitchens, from bungalows in Temescal to split-levels up in the hills.
Quick Answer
The biggest kitchen remodeling red flags are skipped rough-in inspections, undersized or untested ductwork, cabinets installed out of level before doors go on, countertop seams placed at a sink or over the dishwasher, and contracts with uncapped change orders or warranties that expire at final payment. Most of these become expensive only after they’re hidden, so the smartest move is to catch them during the build, not after. A written price and a written guarantee before work starts are your first line of defense, and every project we take on begins with both.
Styles & brands we work with
- Kitchen remodeling
- Bathroom remodeling
- Home additions & ADU
- Roofing
- Windows & doors
- Driveway & pavers
- Fence
Table of Contents
- Pre-Drywall Inspection Points to Walk With Your Contractor
- Cabinet Installation Tells Before the Doors Go On
- Countertop Seam Placement: What’s a Red Flag
- Permit and Inspection Gaps That Become Title Problems
- Contract Language Warning Signs
- Oakland-Specific Red Flags You Won’t Find Elsewhere
- A Step-by-Step Walkthrough Schedule
- When to Call a Professional
Pre-Drywall Inspection Points to Walk With Your Contractor
The pre-drywall walk is the single highest-value hour you will spend on your remodel. Once the walls close, every problem becomes a demolition project. Ask your contractor to schedule this walk, show up with a phone flashlight and a level, and take photos of everything before it’s covered. You have every right to be there, and any contractor who resists that walk is telling you something.
Here’s what to physically verify:
- Drain slope. Every drain line needs a quarter inch of fall per foot of run. You can’t measure that exactly with a phone, but you can see whether the plumber left the pipe visibly sloped or running flat. Flat pipe is a future clog behind a finished wall.
- Duct continuity. Follow the range hood duct from the hood location toward the exterior. Every joint should be taped or sealed, the duct should be rigid metal rather than flex where it passes through a wall, and the run should be as short and as straight as the layout allows. Ask whether the duct was sized to the hood’s CFM rating. If the answer is vague, press. An undersized duct is the exact problem in the opening of this guide.
- Blocking location. Blocking is the wood framing added inside the wall where heavy things will later attach. If you’re planning floating shelves, a wall-mounted pot filler, a microwave bracket or grab bars, the blocking has to go in now. Point at the spots on the wall and ask the contractor to mark where the blocking sits.
- Electrical and rough-in boxes. Count the outlets you were promised. Check that boxes are level and that the range, fridge and dishwasher have dedicated circuits as drawn.
- Water shutoffs. Confirm the sink and dishwasher shutoffs are accessible, not buried.
Take dated photos of all of it. Those photos are worth their weight in gold if a repair is ever needed behind the wall, and they’re a documented trail if you ever sell the house. In our experience working Oakland’s older housing stock, where a 1920s bungalow in Temescal may have had three remodels layered over each other, that photo record is often the only reliable map of what’s actually behind the plaster.
Cabinet Installation Tells Before the Doors Go On
Cabinet problems hide themselves the moment the doors go on and the countertop lands. A box that’s a half inch out of level gets masked by a filler strip, and by the time you notice the drawers won’t stay shut, the install is signed off. So the window to catch this is the day the boxes go up and before the doors arrive. Ask to see the kitchen at that stage.
Here’s what to look for:
- Racking. Racking is when a cabinet box gets twisted so the front face isn’t square to the sides. Lay a 4-foot level on the cabinet face and look for a gap under one end. Even a small gap means the box is racked, and doors on a racked box will eventually bind or hang crooked.
- Out-of-level boxes. Upper cabinets in a run should be dead level across the whole span, not just level to each other. Check the countertop line too. A lazy install fights the wall instead of shimming it flat.
- Wall anchoring. Cabinets have to be screwed through the back into studs. Ask how many fasteners per box and where. Two screws into drywall anchors on a 30-inch upper is not anchoring, it’s decoration. In a seismic region like the East Bay, proper anchoring matters even more.
- Tight joins. The faces of adjacent cabinet boxes should be flush with each other and aligned. Run your hand across the joint. Any step you can feel is a tell.
- Filler strips. Some filler is normal. A lot of filler on one side tells you the cabinet layout was measured wrong, or the wall wasn’t checked for square before the order went in.
These are the same cabinet lines we install on our projects, including KraftMaid and Wellborn, and the quality of the box can’t make up for an install that’s out of square. The door reveals the sins at the end. Look at them while the boxes are bare.
Countertop Seam Placement: What’s a Red Flag
A countertop seam is where two slabs meet, and every countertop over a certain length has one. The seam itself isn’t the issue. Where it lands is. Seam placement is a workmanship decision, not a design whim, and a seam in the wrong spot is a tell that the fabricator either measured wrong or cut corners.
Red flags to learn by sight:
- A seam over a dishwasher opening. The dishwasher opening is on the front of the cabinet run, and a seam running above it means the countertop has less support near a high-traffic, high-vibration zone. It’s a weak point, and it shows up as a crack years later.
- A seam directly at a sink. The sink is where water lives, and a seam at the sink rim means moisture works into the joint every time someone washes dishes. The better placement is a foot or two off the sink, away from the wet zone.
- Seams that don’t line up in color or veining. On quartz or stone, the fabricator should bookmatch or at least align the veining so the seam reads as part of the slab. Misaligned veining is a sign nobody set the slab dry before cutting.
- Seams placed to save a slab. Sometimes a seam exists because it was the only way to fit the layout with two slabs rather than three. But if the seam means you’re sacrificing function at the sink or the dishwasher, ask about a different slab layout. Slab sizing is a design decision you can make before the order.
We install Cambria quartz, Silestone and Caesarstone, and each carries its own manufacturer warranty alongside ours, which is a layer of protection worth naming in your contract so you know who to call if a seam ever fails. In our experience, seams fail at the same rate a fabricator does. Choose a fabricator who dry-fits the slab on site before cutting, and walk the seam layout with them before the saw goes in. It’s Oakland-specific too: in older Rockridge and Piedmont-adjacent kitchens, walls are rarely square, so a countertop that fits snugly at the wall behind the sink may be an inch off at the far end. Get the seam plan in writing with the slab layout drawing.
Permit and Inspection Gaps That Become Title Problems
Here’s a warning sign that doesn’t show up until years later: a missing rough-in inspection. Local building departments require what’s called a rough-in inspection at the point when framing, plumbing, and electrical are installed but before the walls are closed. A contractor who skips that inspection is telling you, quietly, that the work either isn’t up to code or isn’t important enough to document. Either way, you own the consequences.
Here’s why it matters when you sell:
- The permit stays open. When the work has no final inspection, the permit remains open and appears on the public record. A buyer’s agent will find it, and so will the title company.
- The title company flags it. An open permit or work without a permit can hold up a sale or put you in a position where you’re paying to have work opened up and inspected years after the fact.
- Real estate disclosure. In California you generally have to disclose unpermitted work. That disclosure can shrink your buyer pool and lower the price.
- Insurance risk. If a fire or a leak ties back to unpermitted electrical or plumbing, your insurance company may question the claim.
The fix is straightforward: before the first nail goes in, ask for the permit number and the inspection schedule in writing. Confirm both the rough-in inspection and the final inspection are on the calendar. If a contractor suggests skipping the permit because “it’s not structural” or “it’s just cosmetic,” that’s a red flag you can’t unsee. In Oakland, permit activity is tracked through the city’s online permit portal, so you don’t have to take anyone’s word for it. Look it up yourself.
Contract Language Warning Signs
The contract is where the quiet problems live. A verbal estimate that shifts on demo day may sound like a horror story, but the actual mechanism is boring contract language. Three clauses matter the most.
- Change orders with no price cap. A change order is an agreement to do work outside the original scope. A well-written one includes a fixed price and a written signature from you before the work starts. A clause that says change orders “will be billed at time and materials” or that reserves the right to adjust without a cap is the legal version of putting a target on your wallet. Ask for a written change-order process that requires your signature and a firm price before any extra work begins.
- Allowances in place of real selections. An allowance is a dollar amount budgeted for a material you haven’t picked yet. Some allowance is normal when you’re at the contract stage but haven’t finished selecting tile and fixtures. What’s a red flag is a contract loaded with allowances set at a lowball number, because the difference between the allowance and the real cost of your selection gets billed to you as an “extra” later. Insist that allowances reflect realistic numbers for the products you actually intend to use, and get the brand and model level named where possible.
- Warranty that expires at final payment. Read the warranty language carefully. If the warranty period ends when you make the final payment, you have no protection during the period when small failures show up. Look for a written warranty that starts at final payment and covers a defined period after, with a defined remedy if something fails. That’s the logic behind our 365-Day Done Right Promise: if the work fails inside that period, we come back and make it right at no charge, and it’s included in writing on every project. If a contractor won’t put a warranty like that in writing, ask why.
One more clause worth checking: what happens if the contractor can’t finish. A payment schedule tied to milestones, not to a flat deposit, protects you if the job stalls. Never pay for work that hasn’t been completed. In Oakland and across the East Bay, a written, milestone-based payment schedule is standard on a good contract and should be spelled out clearly.
Oakland-Specific Red Flags You Won’t Find Elsewhere
Some of the most expensive kitchen problems are local, and a contractor who works in Oakland regularly will know them. A few we watch for:
- Hillside and foundation movement. Houses in the Oakland hills sit on slopes, and some have seen foundation movement over the years. Kitchens built against a wall that has shifted will show cabinet doors that won’t stay closed and cracks at the corner joints. A contractor who hasn’t checked wall plumb before ordering cabinets is setting you up for doors that never hang right. This is where a written price that includes wall prep matters, because correcting out-of-plumb walls isn’t free.
- Lath and plaster walls. Plenty of Oakland bungalows still have original lath and plaster, which is thicker than drywall and behaves differently when anchoring cabinets or hanging a range hood. The right installer accounts for the extra thickness; the wrong one ends up with cabinets that sag.
- Older electrical service. Many Oakland homes still have older electrical panels with limited capacity, and a kitchen that adds a new range, hood, or dishwasher circuit will test it. A contractor who doesn’t confirm service capacity before the project starts is one who’ll surprise you with an extra electrical bill mid-project.
- Earthquake-era bracing. In a region with seismic risk, cabinet anchoring and hood mounting deserve more than the minimum. This is worth asking about explicitly: how are the new cabinets anchored, and how is the hood secured to the framing above?
These aren’t theoretical. In our work across Oakland neighborhoods, from Temescal to West Oakland to Rockridge, these four conditions show up on more kitchens than not. If a contractor’s bid doesn’t mention any of them, be suspicious. A written price that reflects the actual house you have beats a lowball number that turns into change orders the day demo starts.
A Step-by-Step Walkthrough Schedule
Put these checkpoints on the calendar with your contractor before day one. Each is a chance to see the work while it’s visible.
- Day of demo. Walk the demo area with the contractor. Confirm what’s staying and what’s coming out. Photograph everything.
- Rough-in inspection. Attend this walk. It’s the plumbing and electrical, exactly at the point described above. Confirm the permit number, and be there when the inspector is on site if you can.
- Pre-drywall walk. Do everything in the first section: drain slope, duct continuity, blocking, outlets, water shutoffs.
- Cabinet install, before doors. Walk the kitchen with the door boxes still wrapped. Lay a level on the faces. Check the anchoring and the joins.
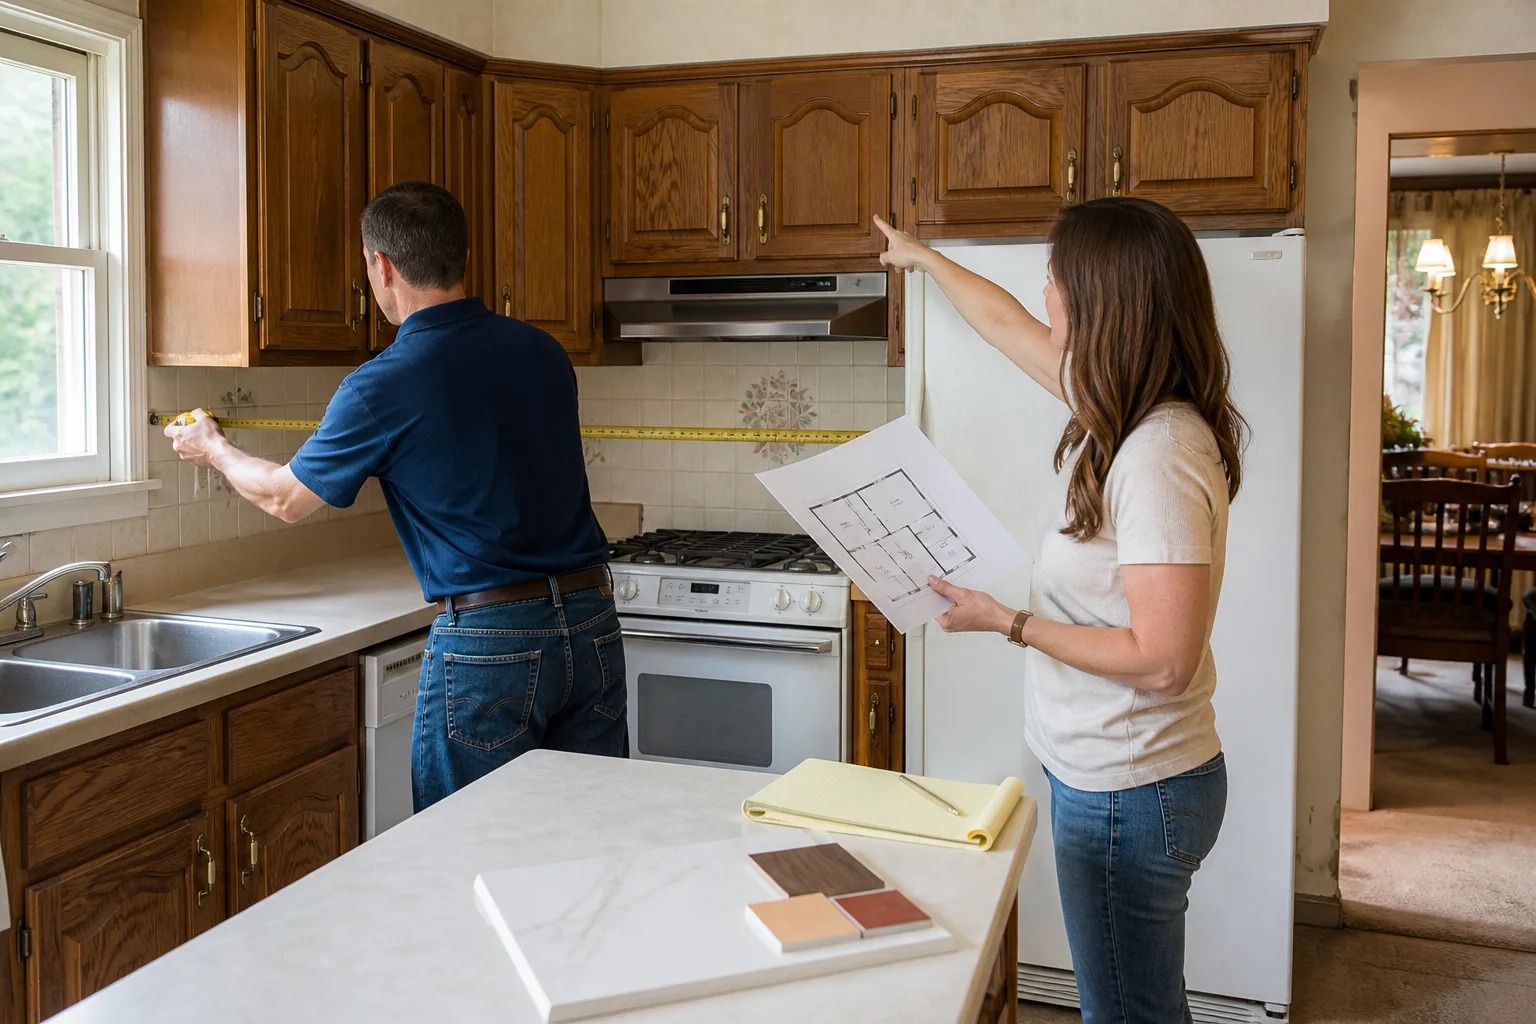
- Countertop dry-fit. See the seam layout before the slabs are cut. Point at the seam placement. Make sure it’s not over the dishwasher or at the sink.
- Final inspection and close-out. Confirm both the final inspection and the written warranty are in hand before you make the last payment.
Any contractor who pushes back on being present for these walks, or who won’t put the schedule in writing, is telling you the plan is loose. The Kingswell Way is straightforward: say the price before the work, show up in the window we gave, and leave the place cleaner than we found it. In practice, that means each of these walks is easy to schedule because it was in the plan from the start.
Common Mistakes to Avoid
- Skipping the pre-drywall walk. It feels like a step to skip after a long week of work, but the walk is when problems are still cheap. Once the drywall is up, every fix starts with demolition.
- Choosing the lowest bid that didn’t name the house. A bid written without a wall check, without a demo scope, and without mention of the local conditions above is a bid that will grow. The number on day one should be the number on the invoice.
- Signing a contract with an uncapped change-order clause. Change orders are normal. Unbounded change orders are how a kitchen doubles in cost.
- Assuming the permit isn’t needed. Cosmetic work still often needs a permit, and skipping one leaves you with a title problem in Oakland when you sell.
- Not photographing the walls before close-out. Those photos are the only record of what’s behind the drywall. Ten years from now, they’re what a future plumber or electrician needs.
- Picking a contractor who won’t put the warranty in writing. Verbal warranty language is not a warranty. Get it in writing, with a clear remedy and a defined period.
- Not walking the countertop seam layout. The seam placement is not something to discover after the slab is cut.
See the difference
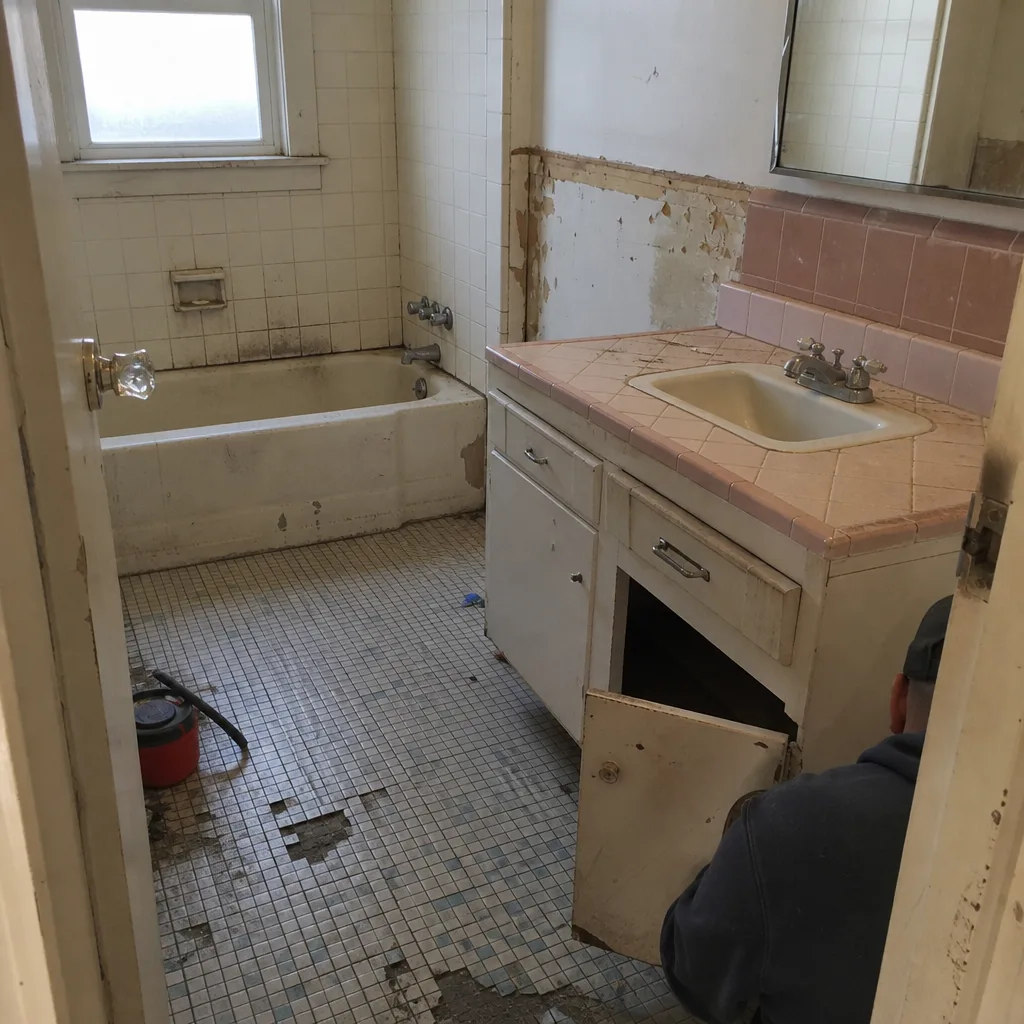 Before
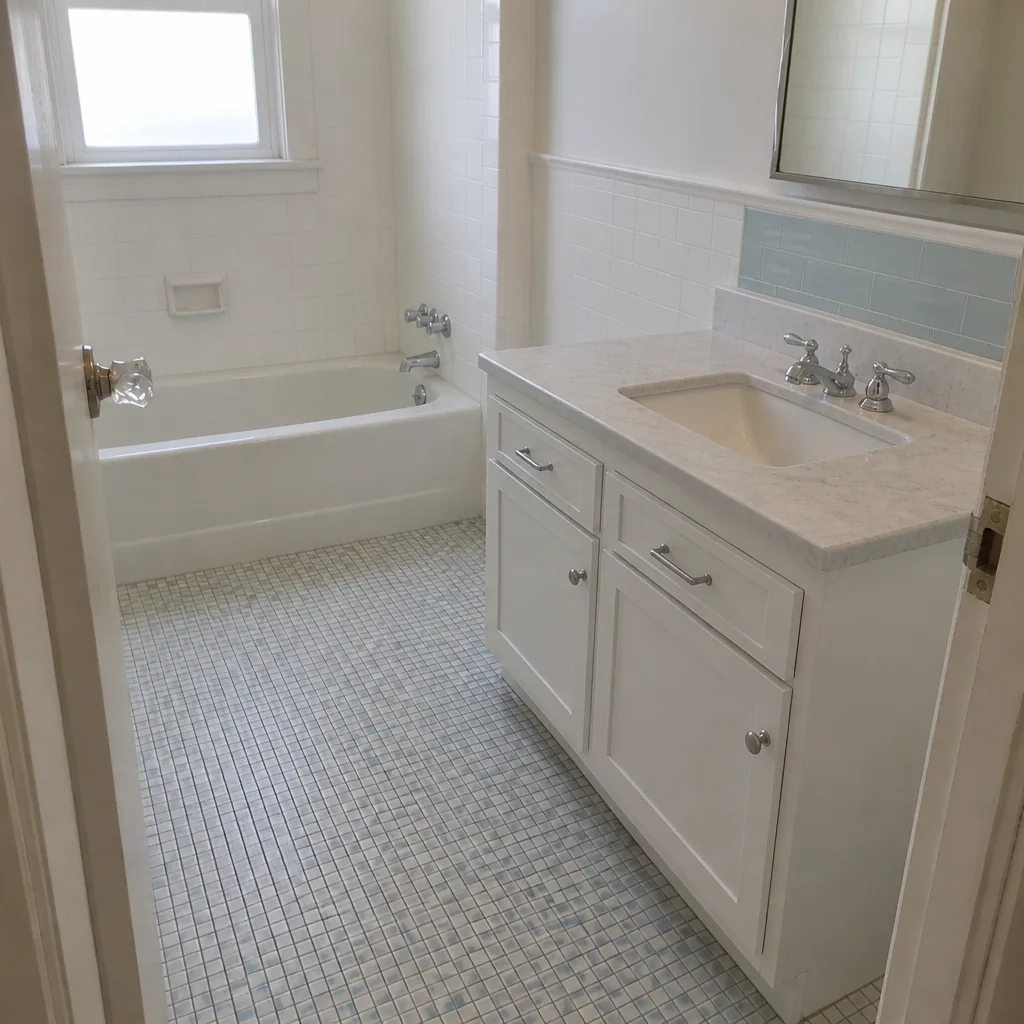 After
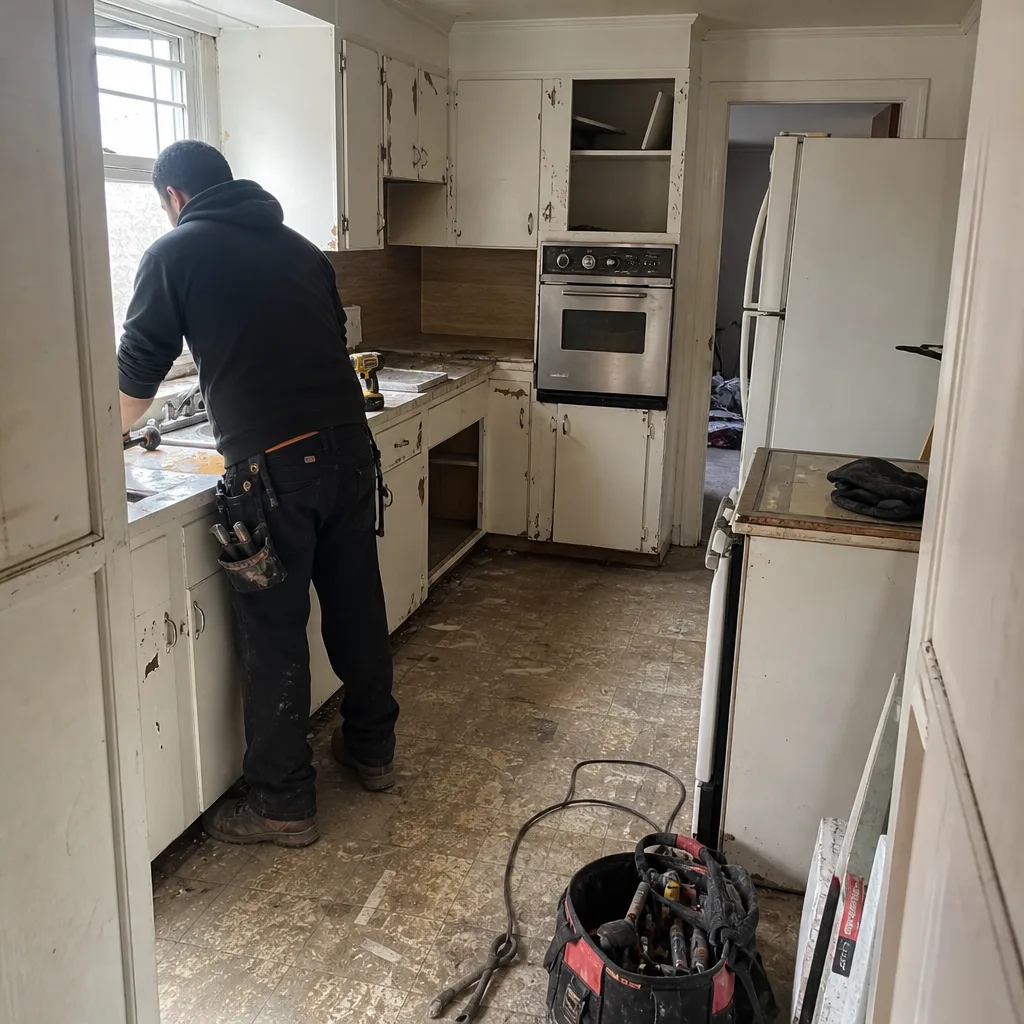 Before
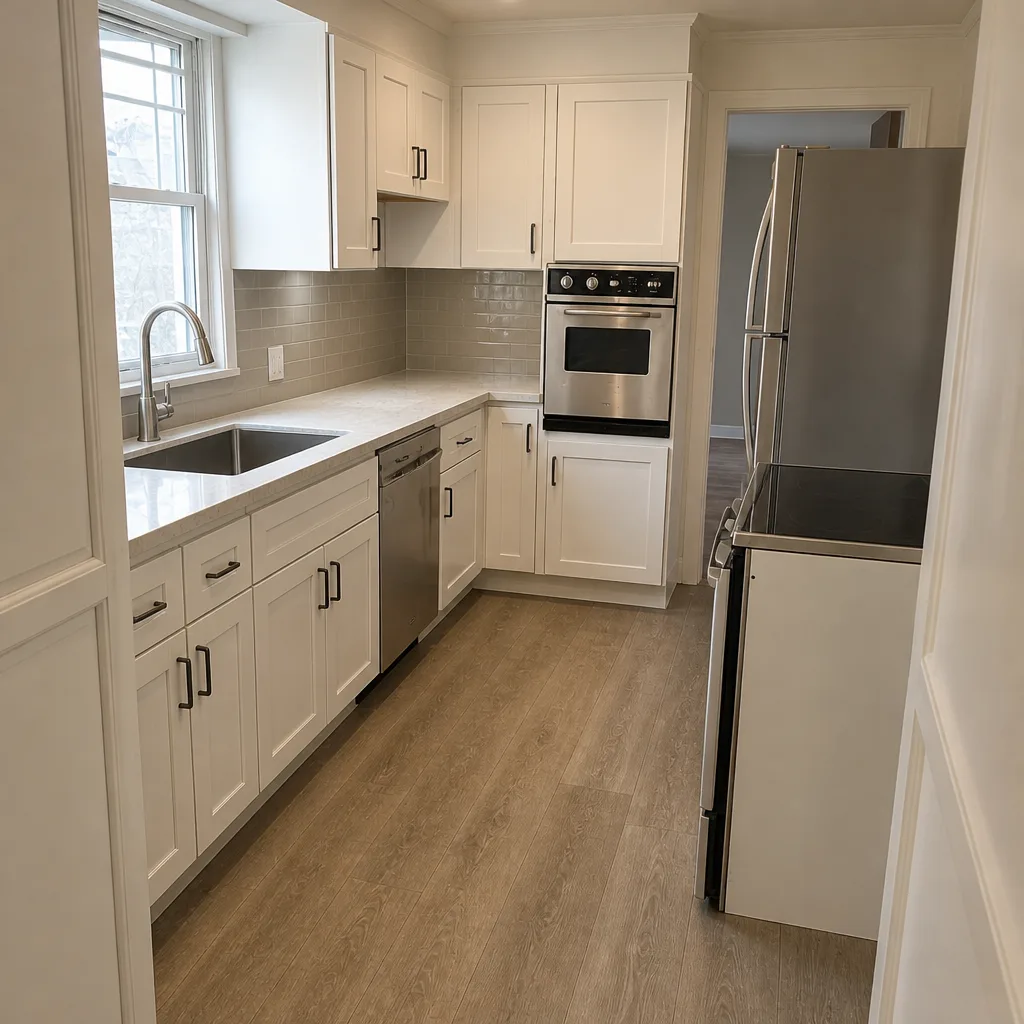 After
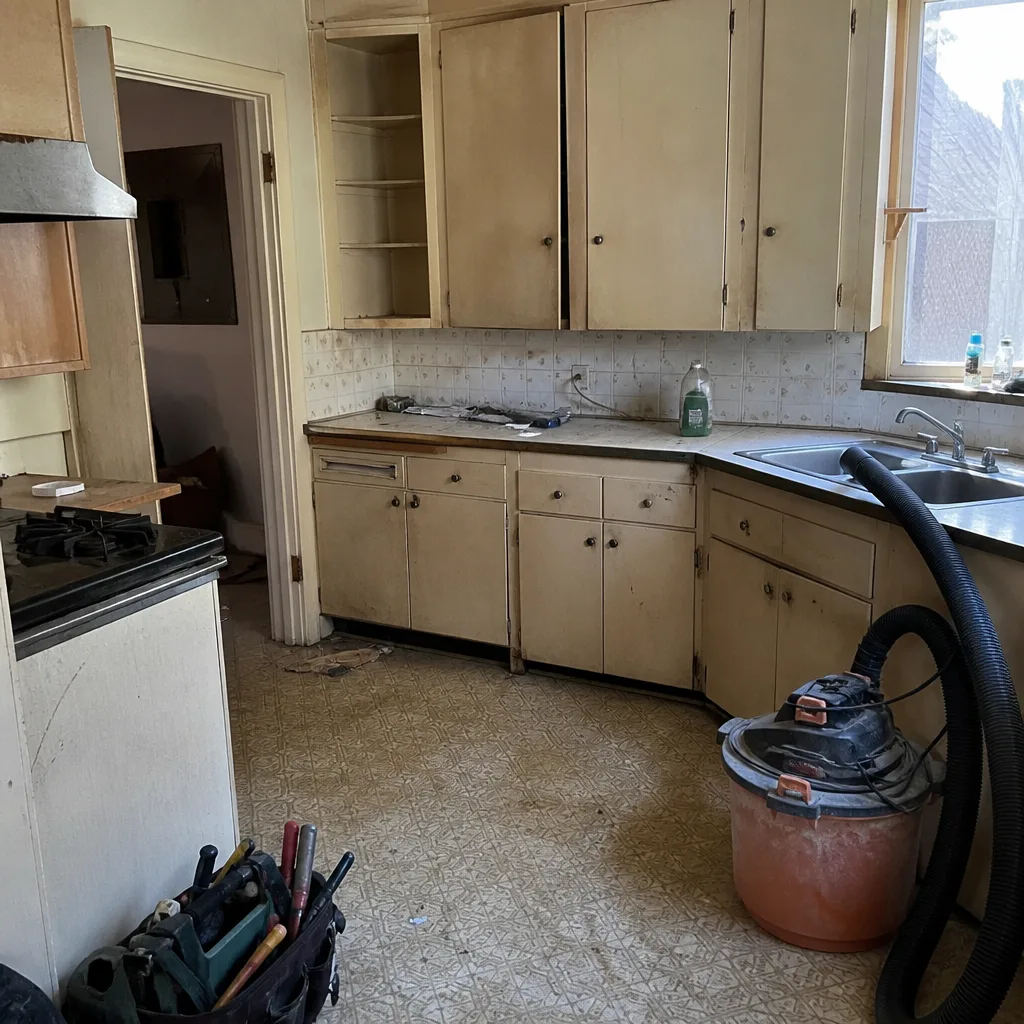 Before
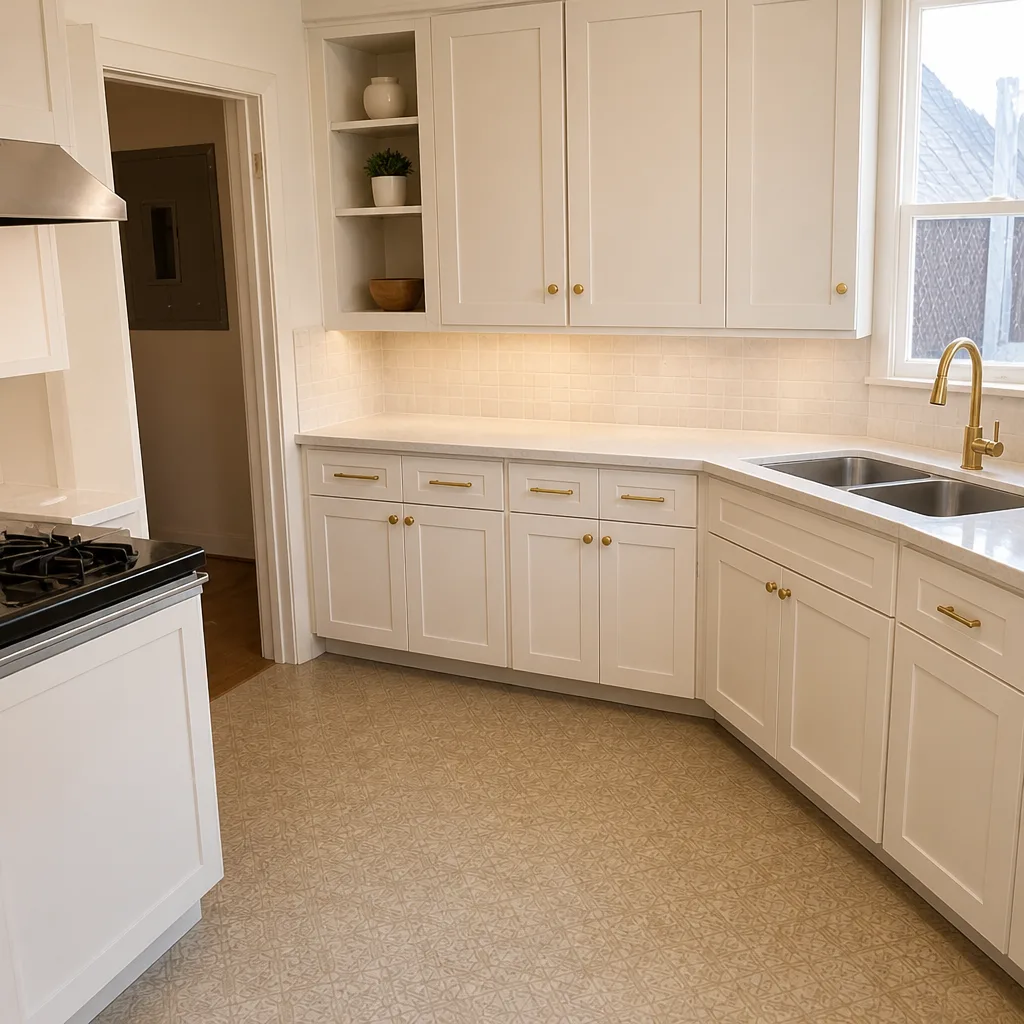 After
When to Call a Professional
Call a professional before demo starts if any of these apply: your contractor can’t produce a permit number, there’s no pre-drywall walk in the plan, the contract has a change-order clause without a price cap, or the warranty expires at final payment. Also call if you already have a kitchen open and you’re seeing racked cabinet boxes, seams over a dishwasher, or walls that aren’t plumb. These are all fixable problems, but only if they’re caught before the door hardware and countertops go in. Penhallow Remodeling Oakland offers free estimates in Oakland, and you’ll walk through the plan before you commit to a number. Call (888) 403-1237 to schedule yours. A live person answers the phone 24/7, so you’re not leaving a message and hoping for a callback.
Frequently Asked Questions

The biggest red flag in kitchen remodeling is a skipped rough-in inspection, because it’s the one shortcut that stays invisible until you sell the house, and it can also hide code problems that are expensive to fix. Right behind it is a contract that lets change orders grow without a price cap. Either one tells you the contractor is cutting corners you’ll pay for later. Call (888) 403-1237 for an exact quote on your project, and the estimate is free.
Walk the kitchen before the doors go on and lay a 4-foot level on the cabinet faces. A gap under one end means racking. Also check that boxes are level across the whole run, that faces are flush at the joints, and that each box is screwed into studs, not just drywall anchors. If the boxes are out of level, the doors will eventually hang crooked. A written price and written guarantee from day one give you leverage to insist on the walk. Call (888) 403-1237 to book a free estimate.
No. A countertop seam over the dishwasher opening or directly at the sink is a workmanship red flag, not a design choice. Both spots put the seam in a zone of vibration or moisture, so the crack risk goes up. The seam should sit a foot or two away from the sink and away from the dishwasher opening. In older Oakland kitchens where walls aren’t square, get the seam layout in writing with the slab drawing before anything is cut. Call (888) 403-1237 for an exact quote.
If the rough-in inspection is skipped in Oakland, the permit can stay open, and an open permit can flag the house during a title search. You may also have to disclose unpermitted work when you sell, which can shrink your buyer pool. The fix is to confirm the permit number and inspection schedule in writing before work starts, and to look up the permit in the city’s online permit portal. Call (888) 403-1237 for a free estimate and we’ll walk the plan with you.
A 365-Day Done Right Promise means the contractor comes back and makes it right at no charge if the work fails inside the one-year period after completion, and it’s included in writing on every project. It should be spelled out on the signed contract, not just spoken. Ask for the exact wording before you sign. Call (888) 403-1237 for a free estimate; estimates are free and there’s no pressure.
A properly written contract should keep the number on day one as the number on the invoice. The price changes only if you sign a written change order with a fixed price for work outside the original scope. If a bid arrives as a verbal ballpark or the contract lets change orders run without a price cap, expect the number to move. Ask for the written price before anything starts. Call (888) 403-1237 for an exact quote.
The Bottom Line
The warning signs that cost the most in a kitchen remodel are the ones you can’t see from the finish line: skipped inspections, untested ductwork, out-of-level cabinets, seams at the sink, and contracts that let the price drift. Catch them early, while the fix is a shim, a re-taped joint, or a clause you rewrote, rather than a demolition and a second project. Whether you’re remodeling in Temescal, the Oakland hills, or anywhere across the East Bay, insist on a written price before day one and a written guarantee before final payment. That’s the standard we work to, and it’s why every project we take on includes both. If you’re ready to start on the right footing, Penhallow Remodeling Oakland provides Kitchen Remodeling in Oakland and Bathroom Remodeling in Oakland, plus the full range of work as your General Contractor in Oakland. Call (888) 403-1237 for a free estimate, and ask for the pre-drywall walk in the plan.
Written by the team at Penhallow Remodeling Oakland.